
Thanks to popular apps like Instagram and Pinterest, we are constantly bombarded with amazing travel pictures every day!
Have you ever looked at other people’s travel pictures and thought
“Wow, I wish I could take pictures like that!”
I have, and honestly it’s not always as hard as it looks!
Sure, I’m not exactly a pro, but our photos are definitely miles better now than when we first started full time travelling as a couple back in 2016.
Naturally, these things take time and practice, and we’ve learned a lot of what NOT to do along the way.
We’ve also picked up a tonne of useful travel photography tips you can follow that will help you take better pictures on the road.
I’ve followed these tips more and more since we started travelling and my pictures have gotten A LOT better.
As I said, I’m no expert, but I’m constantly learning every day.
Throughout this post I’ve included some examples of editing and how I’ve put my tips into practice, which will hopefully help to visually show you how these tips work!

Before we begin, I’m going to list a few common photography terms.
These should help with understanding some of the more technical tips below, and I’ve put the explanations for these terms in basic form…
ISO: This is a setting that will allow you to darken or brighten your photo depending on the lighting conditions in place. So, if you increase your ISO then your photos will grow brighter. This can help when shooting in dark environments, such as when trying to capture the Northern Lights. In these conditions you need a super high ISO to capture the lights and stars.
Aperture: Aperture is the size of the opening in the lens. A smaller aperture lets in less light, whereas a wide open aperture will let more light into the image for a brighter photo. It will also affect how much of the image is in focus.
Shutter Speed: The shutter speed is the part of the camera that opens and closes to let light in, so you can take a picture. The speed of the shutter is how long it stays open. So the longer it’s open, the more light that’s allowed in. However, if something moves when the shutter is open then it will become blurry. This is when a tripod is great. Again it’s applicable to the Northern Lights where you need the shutter speed to be super slow!
Golden Hours: These are two specific hours of the day when lighting is best for travel photography. It’s the hour after sunrise and the hour before sunset.
Exposure: Exposure is how light or dark an image is and it’s controlled through ISO, aperture, and shutter speed.
Noise: Noise in a photo basically makes it look grainy. For example, images that have a high ISO typically have lots of noise, so it’s always best to use the lowest ISO possible for the amount of light you have for the photo. You can reduce noise in post editing and I’ll show you an example below.
In the first photo you can see the original photo that was shot in RAW. It’s dark, it’s just not the right setting. So, I’m going to try and “save” this photo…

You can see that in the second photo, once I add a preset, it adds colour and brightness to the shot; however this image is still very grainy, and it’s because it was shot in the wrong setting.

But in this third photo, I’ve reduced the noise in Lightroom and it “smooths” out the image to make it look better.

This image isn’t perfect, but it does show what you can fix in post editing!
Keen to learn more about post editing? Stay tuned for tip 7.
Okay, now it’s time to get into the travel photography tips …

This is a great tip for travel planning in general; but if you want to take better travel photos, then visiting locations during the off-peak season is definitely a great way to do so.
Travelling during the off-peak months typically means that there are fewer people, so there are less people competing for the perfect shot.
In some cases, you’ll be able to get the perfect shot anytime of the year, but in those super touristy places travelling in the off-season will allow you to take better photos, and honestly, have a better overall experience.
Sometimes the “off-peak” months are rainy and difficult to travel in, but shoulder seasons tend to give you the best of both worlds: low crowds and great weather!
Looking back there are some countries that really work well in shoulder season! For example, India Holidays offer many advantages off season.
Firstly, you get to experience it without the massive crowds that peak season can bring. Popular attractions like the Taj Mahal, Jaipur, or Kerala's backwaters can be enjoyed more peacefully and you'll have an overall relaxed experience.
The weather tends to be pleasant without extreme summer heat or monsoon rain, making it easier to discover and soak in vibrant cultures and stunning landscapes.
Plus, traveling during this period can often mean cheaper accommodations and transportation options.
We rarely travel to anywhere in peak season, the shoulder season is our sweet spot.

As they say … the early bird gets the worm!
I actually hate getting up early, honestly it drives me crazy.
(p.s. It’s not because I’m lazy, I do have a chronic illness after all).
But if I’m chasing the perfect picture, then yes, I will force myself to get up early.
It’s always been worth it!
There are a couple of great reasons why getting up early will help you take better travel photos.
Firstly, there will be less crowds since most people will still be asleep, or certainly not out sightseeing yet.
And secondly, you’ll catch the first Golden Hour of the day: which is the hour just around sunrise, when the light for photography is at perfection.
Before I started appreciating golden hour and it’s light, I never really understood why it mattered so much.
But trust me, if you take shots at a location during this period, then return another time and take shots mid-day, you’ll see a massive difference when it comes to your editing process!
Plus, it’s awesome having a tourist site all to yourself for a while.
If you’re using a drone for photography, then getting up early is key to not having any people stuck in your drone shots.
Of course you can edit them all out, but that’s just extra work and requires learning more skills!

Naturally, my next travel photography tip is the opposite of getting up early: stay out late.
This is something I certainly don’t mind doing!
When I say “staying out late”, I don’t mean until it’s gone pitch black (with one exception I’ll discuss below).
Basically, you want to catch sunset and the hour before sunset, which is the second Golden Hour in photography.
This is when the daylight is redder and softer so makes for a perfect time to take travel pictures.
Plus, everyone loves a sunset, and across Asia and Central America, you’ll be in for a treat with some truly epic sunset shots.
We don’t do night photography, so I can’t give you specific tips for that; however when in Northern Norway, we did photograph the Northern Lights, which requires you to stay out very late into the night.
To see the Northern Lights, you’ll need a couple of things in your favour, but a big one is complete darkness.
So wrap up warm, get your tripod ready and wait it out!

You don’t NEED to fill your camera backpack with the most expensive equipment, just to up your travel photography game. But it does help if you’ve got a decent travel camera or even a high quality camera on your phone.
Most of the latest smartphones have very high quality cameras, like the iPhone & Samsung Galaxy, and you’ll be able to take great photos by using the settings to their full potential.
But, if your budget allows it, then I do suggest you invest in a standalone camera.
We use a Sony a7iii which we couple with a video lens, making for a top quality vlogging & photography setup all in one.
So this is a great option if you want to take awesome pictures AND make really cool travel videos!
Prior to this we had the Canon G7X Mark ii, which is more affordable, and I used ours for a good few years before trading in and upgrading.
If you want to do landscape photography, then you’ll need to purchase a DSLR (Digital Single Lens Reflex).
When it comes to DSLR cameras, it’s all about the lens, which you’ll need to purchase separately.
The DSLR we use is super old now, it’s a Nikon D300 (the old version of the Nikon D780), but because I bought a newer lens for it (for the purposes of landscape photography), it works absolutely perfectly.
There’s no need for me to buy another camera when my camera works fine, I can just upgrade or change my lens for what I need.
Cameras have become much more affordable in recent years, so I don’t think you’ll have a problem finding a good quality camera for a great price, and second hand cameras aren’t a bad idea either.
Of course, if you want to be a hardcore photographer, then quality equipment is important, but this post is for the purpose of creating awesome travel pictures, not building a career as a photographer.
We actually put together a long in-depth post on the best cameras that other bloggers use. I recommend checking it out as it includes testimonials from fellow travel bloggers and what cameras they use.
Here it is --> The Best Cameras For Blogging

The Rule Of Thirds is the oldest rule in the photography book, and honestly, it was something I ignored for a long time.
But once you realise the simplicity and purpose of it, you’ll see just how much of a difference it can make to your travel photos.
The rule of thirds is the idea that you divide your image into 9 even squares.
You’ll actually find that most cameras have these features automatically built into the display options.
Next, you then place your subject, or points of interest along the square and lines.
For example, if you’re taking a picture of a horizon, you don’t place it in the centre of the image (unless your purpose is to take a reflection shot).
The idea behind the theory is based on what our eyes naturally find pleasing, and it takes a while to get it right.
But it’s also important to note, that the rule of thirds isn’t scientific and it doesn't apply to EVERY shot.
So don’t rely on it, especially if you think a photo looks better another way.
It’s just a great place to start if you’ve never taken photos before.
Here’s an example …

We live in a world where there is so much opportunity to learn.
And what better way to learn how to take better travel photos than with an online course.
I’ve learnt a lot from online photography courses, particularly via Udemy who offer a lot of choice for a very cheap price; such as:
You’ll find courses everywhere, and even if you don’t want to pay for one, then just try one from Youtube!
Check out:
It’s a fantastic way to pick up new tips, and don’t forget that when it comes to photography, practice makes perfect.
It’s all well and good knowing the theory of something, but if you don’t put it into practice, you’ll never really learn.

There seems to be this misconception that if you edit a photo...it’s cheating.
Well I’m sorry to tell you that 99% professional photos have work done to them, and this has been happening since people started taking photos.
It’s not about misconception, but actually it’s a lot to do with the camera we are using and the fact that a picture sometimes can’t represent what we’re actually seeing with our eyes.
The ability to edit or enhance a photo allows us to bring a photo to life.
The point is, photos are edited and you can help enhance your photos by using Lightroom or Photoshop.
Photoshop is much more advanced, and you’ll only need it if you plan on doing more serious photography or you simply want to advance your skills further.
But I actually suggest you take a course on using Photoshop, because there is a lot to learn!
But for the rest of us, we can use Lightroom!
Lightroom is an easy application that allows you to quickly edit your photos.
It’s free and can even be downloaded as an app on your phone (Android / Apple), or you can pay for it for desktop editing.
If you don’t know where to start when it comes to editing, then you can always use presets!
Presets are like photo filters that automatically apply to your photos and enhance them instantly.
Hundreds of people on Instagram now offer presets and you can download free presets if you don’t want to pay.
When you use presets, you’ll often find that they don’t make a photo look exactly the way you want all the time, and that’s when you can make small adjustments and learn what works!
Eventually, you start creating your own style and you start forming your own presets.
They’re a great way to quickly edit and help you learn tweaks and adjustments to a photograph.
Editing photos has become one of my favourite ways to kill time on long flights.
The effects of presets: This is how quickly a preset can enhance your photo.
The first photo is the original base photo, without any edits. It still looks beautiful, but the lighting doesn’t reflect the reality!

The second photo is with a preset and it adds a little extra oomph to the photo.


Practice makes perfect!
There’s no point reading all this, and other articles online about travel photography tips, if you don’t actually try them.
The only way you’ll get better is to take more pictures!
Consequently, this means you need to travel more….but why would you complain about that! :P
You don’t need to travel internationally to practice either.
There is often a lot of undiscovered beauty in our home towns and home countries.
For example, though I’ve lived there my whole life, it took me years before I really saw Ireland.
In fact, when I road tripped the entire country, I was truly blown away by how beautiful it was!
It’s also a good idea to practice in different areas.
For example, shooting at a beach will be different than shooting with a mountain range.
And, shooting a landscape is different than shooting a person in a photo.
So practice different scenes and scenarios to develop and enhance your skills.

I have this really annoying habit now, which is that when I’m travelling with 2 or 3 different cameras, I HAVE to take the photo on all 3….
Sometimes it’s not viable if I’m under a time constraint or there’s lots of crowds around me, but when I can, I try to capture the same shot on two or 3 different devices.
Why?
Firstly, different cameras can produce different results, and I like to see those results and decide what’s best.
And sometimes it’s just nice to create something new.
For example, we’ve recently started shooting pictures with the GoPro Hero 8 and it’s crazy high quality and brings a unique frame to some picture locations. It's even better if you use a GoPro gimbal to help steady all your shots.
Also, when you shoot with different cameras, you’ll soon learn what works best for what.
For example, I use my DSLR (and wide angle lens) for landscape shots of lakes, mountain ranges etc.
And for Instagram based shots, where one of us is the focus, I use my Canon G7X Mark ii.
Oh, and we’ve discovered the GoPro is often the best for selfies, so when we do take one, we try and use the GoPro.
If you don't want to splash a lot of money on a new action camera, then check out my list of the best GoPro alternatives. Many of these have the same quality but cost a fraction of the price.

You can learn so much from others, and the only reason I can take better photos and edit better today is because of other people.
I’ve had lots of inspiration on Instagram and other fellow travel bloggers.
And whilst I don’t try to copy them, I do try and take inspiration from their work and apply that to my own.
Some of my favourite presets that I’ve used, and have proved to be a great starting point, are from …
To get better with presets, you can watch tutorials on Instagram, Youtube and just keep surrounding yourself with new ideas and other people’s great content that will allow you to learn.
These are my favourite travel photography accounts on Instagram

Before I visit a location, I’ve usually already searched for it on Instagram and I’ve saved location or picture ideas that I really like!
This came in particularly useful when planning where to stop on our visit to The Lofoten Islands.
This is a pretty large region, and we only had two days to visit.
By researching ahead of time and bookmarking great locations I’d seen featured in other blog posts and on Instagram, it allowed us to maximise our time there and get the best possible photos.
Bottom line...
When you bookmark your locations, you can organise your time SO MUCH BETTER.
If some locations require a sunrise light with no one around, then visit those first, and save your spots that provide epic sunsets to the end of the day!
You can also download Locationscout which is one of the best travel apps out there for photographers. Once you've typed in a destination or city, it will show you all the popular photo spots and give you tips on the location, lighting, and the best time to visit.

When you arrive at your chosen destination, it’s a good idea to scout out that location before you photograph it.
This allows you to get an idea of the exact shot you want to create and to make sure it actually exists (sometimes people tag locations wrong on Instagram).
If you are arriving in a new place without any plans of exactly where to shoot, then simply take a drive around and scout out your own locations.
This is how you discover great new places.
Then, bookmark them on your phone and, when you’re ready to head out early the next day, you can shoot the awesome locations you’ve discovered.
This is easier in some locations than others, and it’s far easier if you’ve got your own form of transport, such as a moped or car.
It’s always better to be organised when it comes to travel photography, or you could end up missing out on the shot of a lifetime!

Travel is all about creating memories that will last a lifetime.
So don’t get too caught up in the moment of taking “the perfect picture”, because honestly, there is no such thing.
The perfect picture is subjective to the person looking at it!
So create a memorable experience, take photos and have fun with it.
As long as you love your photo, then that’s all that matters!
If you’re travelling as a couple, then you could get creative with your photos all whilst having fun. For example, doing lifts (I would NOT look graceful doing this), kissing (if you’re comfortable in public - and it’s allowed!!), jumping around, holding hands, whatever!
Just do what comes natural and you’ll create a really great photo memory.
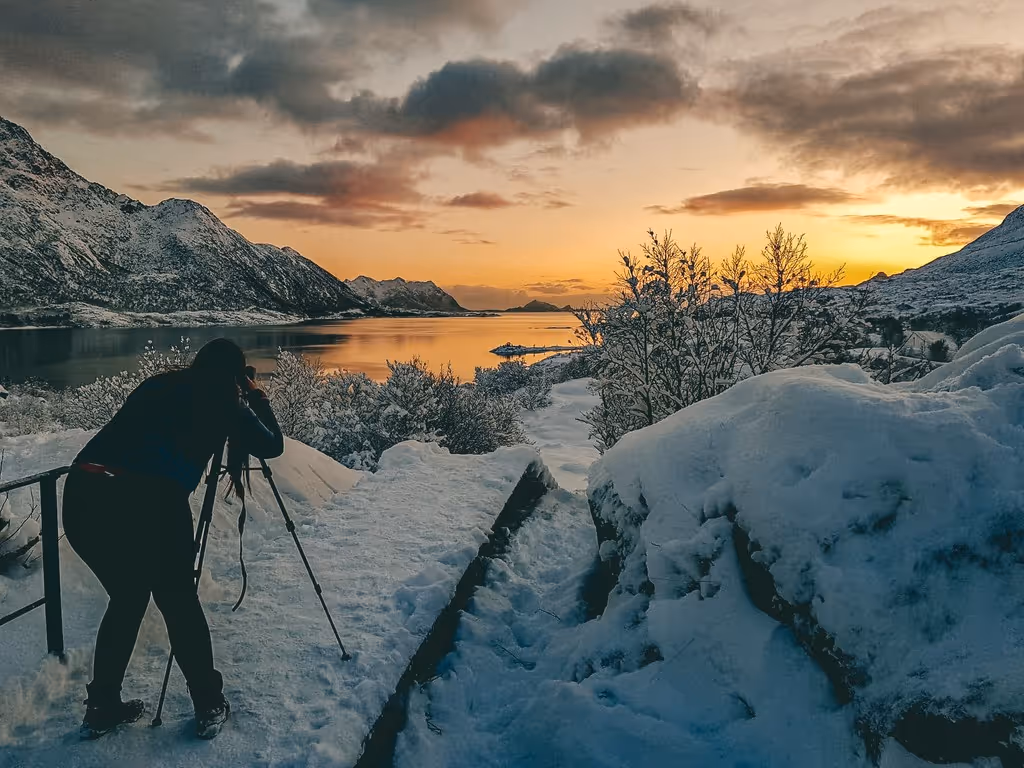
If you were to look back at our photos over time, you would see a massive difference in our photos from when we didn’t have a tripod, to actually having a tripod.
When we first bought a tripod, I actually bought a tiny, flimsy one that would tip over in the wind...so don’t buy that kind!
But when I finally invested in a decent tripod, (like this one here) it made all the difference to our photos!
Having a tripod will allow you to take portrait and landscape photos when you’re solo travelling, or if you’re a couple or group of friends wanting to take cool pictures.
Also, a tripod is a really practical and important tool for taking landscape shots, or shots where you are dropping the shutter speed down super low.
You can’t create those same shots with just your hands, a tripod is key to taking your travel photos to the next level!
A tripod will also help you frame a photo better.
If you plan on recording videos while traveling, I highly recommend getting a DSLR camera gimbal, allowing you to get stable shots even whilst moving.
When you take a photo on your camera, and pop it on timer, you need to run into the shot within the time limit (ours is 30 seconds).
However, if you have a remote or button that’s hooked up to your camera, then just get ready and click the button and your photo will be taken!
This means you won’t need to run back and forth between shots.
Different remotes/buttons will be compatible with different cameras, so just have a look on Amazon to find one to suit your chosen device!
It just makes life a lot easier when taking travel pictures.
If you can’t, then just set your camera to the highest duration on your timer and you’ll hopefully have enough time to get in the shot.
Some cameras can actually link up to an app on your phone that you can take photos via.

Burst mode is KEY to getting natural, high quality travel photos.
When you shoot in bursts your camera takes around 10-30 shots in one click (depending on your camera) and it means that you capture the “in between moments”.
This is particularly good if you’re awkward in front of the camera.
I can see what type of picture I want in a shot, but when it comes to me doing it, I can become an awkward turtle.
By shooting in bursts, I can walk around, spin and it will capture me doing something natural.
Burst is perfect if you want travel shots where you’re laughing, smiling and expressing other emotions.
Those in between moments are where the true awesome travel pictures are created.
Obviously, shooting in burst takes up more memory, so once you’ve chosen the photos you like in the editing process, delete the rest.

It’s easy to rely on “auto mode” because it’s quicker and modern cameras have good capabilities of adjusting to the scene.
However, auto mode doesn’t work in all conditions.
For example, when shooting at night when there’s low light and you need a super high IOS.
I shoot with my auto mode around 50% of the time, and my photos still turn out great because I can work with them post edit.
But, if you want to take your travel photography to the next level, then it’s time to switch to manual mode.
If you’ve never used a camera before, then you might not recognise the terms ISO, aperture, shutter speed.
For a quick explanation, head back to the top of this post where I provide definitions.
Simply put, if you want to take a great picture then having the ability to adjust these to the required settings will really help.
I’ll admit I’m still currently learning this, and it takes some time, practice and reading up on what settings work for different situations.
You can find lots of guides and information on manual mode online, and actually that is another thing a course is really good for.

When we take photos on our camera, they’re typically set to be taken in JPEG form, and that’s a term you probably recognise.
But when I shoot any travel pictures, I always shoot in RAW and I encourage you to do so too. RAW files save all the data from the picture you took and don't compress them.
This means that when it comes to editing the photo, you can really change and switch up certain elements of the shot without damaging it.
A JPEG removes some of the quality and details of the shot, which will limit your editing capabilities.
Most cameras have the ability to shoot in RAW, even phones like the iPhone and Samsung Galaxy let you shoot in RAW.
Just pop onto your settings and you’ll find the details.
But be aware, a RAW file is larger than a JPEG since it’s not compressed, so be wary of that if you’re short on memory.

If you want to create really cool, unique travel photos, then you need to be mindful of the colours in your shot and the colours that you're wearing.
For example, if you’re shooting in a jungle that’s surrounded by green, and you wear green, then you’re really just going to blend in with the shot.
But, if you wear a contrasting colour, such as red, then you will pop amongst the background!
It took me a while to learn the beauty of this tip, but now I always follow it.
So, if I know I’m going somewhere that has a green or blue backdrop, I can dress accordingly (and tell Brad what colour he should wear that day as well).
I’ve popped some photos below so you can see what I mean, but in general I love wearing red and red tends to be a great colour that “pops” so it’s my go-to!
Of course, if you rock up to a great spot and you’re wearing a colour that matches the background, which I have done in the photo below at the Botanical Gardens in Kandy, you can change the colour of your clothing to a slightly different shade, so that it still brings a little contrast to the photo…

Pro Tip: Use a colour wheel to get inspiration on colours for your next photo.

After you’ve been taking photos for a while, you’ll soon realise there is a type of photo that you like...and you’ll naturally start gravitating towards that.
And that’s great because it means you’re creating your own style!
For example, I love a shot that’s “natural”...
It usually involves me walking away from, or towards, the camera in a particular scene, which you can see below…
Or, if I’m shooting just Brad and I, I tend to like us facing away from the camera, towards the view, and sometimes holding hands, which you can see in these photos…
Sometimes, I go crazy and try to create something different, but a lot of the time it looks uncomfortable because it's not my style of photography, and that’s okay too!
For example, you’ll never see a picture of Bradley and I casually dancing...because, well, we’re just not that natural!
It’s all about learning what you’re comfortable with, and shaping your photos into your own creative format.

No one wants the same shot from the same location a thousand times over.
Just because you’ve seen someone else take a shot in a certain location, it doesn't mean you need to recreate that EXACT shot.
Now, I’ll be honest and say I’m totally guilty of this at times, but I’ve tried to get a little more creative over the years and use other shots as an inspiration for a starting point in my shot.
Then, I’ll take it from a different angle, a different pose, a different colour scheme, or time of day etc...I won’t try to create the exact same shot.
In some places this is more difficult than others.
For example, with the Taj Mahal in India, everyone wants that iconic shot of you standing in front of the Taj.
So, in this case, it’s okay to try and get that exact shot, because...well … that’s the shot you came for!
But in general, don’t try to copy everything so that you’re identical, it also means that you put too much pressure on yourself to create something and if it doesn't turn out the exact same, you’ll feel disappointed.
Just BE YOURSELF! Photography and taking travel photos is all about getting your unique personality into those photos and to create those unique memories that are special to you.
Framing & Cropping: This is how framing your photo then cropping well can create the illusion that no one is around you ;)
The first photo is the original photo of me in front of the Taj Mahal, I knew there were people around, and despite my attempts at asking them to move, they wouldn’t. So I tried to centre myself in the photo of the Taj Mahal and take it landscape so that I could crop it after.
This is the second photo with the crop and my edits. It looks like I’ve got a shot with no one else in it...which is what I wanted because I’m going to frame this photo on my wall!


I have no idea if there is a science behind this, but I’ve personally noticed a difference.
When I first started taking photos I would buy the cheapest quality memory card I could find, but as my money pot has grown, I’ve started investing in “higher quality” memory cards
In reality, they aren't even that expensive and I’ve noticed that my travel videos and pictures definitely save at a higher quality…
So, for drone photography and videos, if I’m trying to shoot in 4K then a memory capable of holding that quality is needed.
For example, the SanDisk Extreme Pro is our go-to for massive file size shots; then the next one down for higher quality photos is the SanDisk Extreme.
For anything else, like memory cards for my phone's photos, I use the SanDisk Ultra.
It’s worth noting that when we had a GoPro Fusion, which is a 360 Degree camera, 2 super high quality cards were needed, otherwise the images would not show up on another memory card.
Basically, because images are becoming higher quality, we need higher quality hardware and software to cope with that.

You know when you see people lying on the ground or hanging from something to get the shot? They might look crazy, but they’re probably creating a really cool and unique shot!
Below, I’ve got one of my favourite travel pictures from Sri Lanka, and it involved Bradley swinging on a random swing on the beach in Unawatuna … he had a lot of fun and it made for a really cool, unique shot!
There are lots of ways to get unique angles nowadays, and one of my favourites is the use of a dome, for half underwater/half overwater shots!
I’ve not actually got a dome yet, but I plan on bringing one to my next water based location to get some of these epic shots!
I hope you’ve found these travel photography tips useful!
Please be aware that I am not a photographer, and I have A LOT to learn, but I like to learn!
I’ve seen shots online that I still don’t know how to create, but that gives me a goal and a challenge to create something new.
Do you have anything else to add?
If so, drop a comment below, I'd love to hear your personal travel photography tips!
Also, be sure to check out:


Leave a comment
Let us know what you think!