
In July 2020, amidst a global pandemic, we embarked upon our most daring challenge yet … converting our own campervan!
Over the last 4 years we’ve built up plenty of experience with:
But we had ABSOLUTELY 0 experience in proper DIY!
3 months ago, if you’d said the word “jigsaw” to me, then I would have immediately thought of puzzles.
Complete … amateurs.
But here we are, just 3 months later I am currently sat by the beach in Scotland writing a detailed guide on how to convert a campervan.
And you know what?
I think we made a pretty dang good van!
And if we can do it, I honestly think that absolutely anyone can; it just takes a bit of perseverance, a lot of dedication, many hours spent watching YouTube videos, a few sleepless nights and … oh yeah … money.
Before we continue, let’s take a quick look at the finished product to see what you think.
Before we get stuck into the nitty gritty details, here’s a few quick tips and pieces of advice that I wish I had known before we began …
***To be clear, this is the rough step-by-step process that we followed with our van. Depending on your own chosen layout, and van, your steps will be different. But this is a pretty solid look at what to expect.***

"How much does a van conversion cost?"
This is completely up to you, but as with anything, the more money you can save and use, the better.
In the end, it cost us roughly around £16,000 to convert our campervan in the UK.
This included absolutely everything including:
We have come across people who have spent a quarter of that amount, and people who have spent twice as much.
But as a very rough guide, £10,000 will get you a very nice conversion, not including the initial cost of the van.
If you want a simpler finish, and are happy to use second hand products and reclaim as much material as possible, then you could spend a lot less.
90% of the things in our van are brand new and are top of the range, seeing as we will be living in the van fulltime and have plans to drive it around the world.

Before you can even convert a van into a campervan, you need to actually FIND a suitable van!
If money isn’t an issue, then that helps as you can spend more money on the van itself, and getting a newer van with fewer mechanical issues.
Ours is a 2016 (56) plate LWB H2L3 Peugeot Boxer; so it was 4 years old at the time of purchase.
It’s the 435 version which means that it has additional extras such as built-in sat nav and reversing cameras (look at me bragging about my van).
It had 107,000 miles on the clock when we bought it and was in very good mechanical condition.
If you plan on using a LWB panel van as your base model, then here’s what we looked for & why we choose our van:
For what we paid, we think we got an absolute bargain! Especially seeing as the demand for vans like this has exploded as everyone and their nan seems to be deciding to convert a campervan these days (as of October 2020, I keep reading more and more about how people are struggling to pick up vans for a decent amount).

They are by far the biggest used van site around and have some really helpful filtering tools.
I would search here at least 3 or 4 times a day, and it took about 2 weeks for this van to pop up.
To ensure you get the right van as soon as possible, be sure to set up saved search alerts. You can do this via your account and it allows you to save searches for the exact vans you are looking to buy, filtered by things like price and miles on the clock.
Then, when new vans that meet your criteria get listed, you can immediately jump on the phone and check them out.
I recommend you view vans immediately and be ready to buy! Great vans don’t pop up very often.
It’s best to set up a viewing that day, and take someone with you who knows what they are talking about. If you like it and it ticks all the boxes then buy there and then.
Otherwise there’s a very good chance someone will snatch it away from you.
Dozens of vans get listed on here every day all across the country, and many people use this and not Auto Trader when selling.
Let all of your friends and family know that you are looking to buy a van and what sort of one you are looking for. You never know who is looking to sell one and you may be able to pick one up before it even gets listed online and gets loads of viewings.
Head on over to Facebook and post on there that you are looking, you’ll be surprised by just how lucky you may well be.
Within a 30-50 mile radius of where you live, there should be a whole bunch of used van dealerships. If you have a Google, you will find them and you can call them and see what they have in stock. If you leave your details and exactly what you are looking for, then they can give you a call as soon as something pops up.
I’m not going to spend hours listing every forum, website and Facebook group that you can search through, so instead have a little search and see what pops up.
There are other websites like Autotrader and Gumtree that people list their vans on, they just may not be as frequently updated.
Your best bet here may be to find local buy & sell groups on Facebook and list what you are looking for on there.
I won’t dwell too much on this topic as I am by no means an expert, and the availability of insurance will depend on a number of different factors.
However, if you are arranging insurance for a conversion, then you will need “motorhome conversion” insurance.
A number of brokers offer this, and they have varying requirements in terms of the amount of time they allow you to complete the build in.
Our chosen insurer gave us a 3 month conversion policy, and we added on a couple of extras to our policy such as breakdown cover throughout Europe.
It’s worth spending a good day or so calling up all possible insurers and carefully comparing their policies before settling on your final choice.
We had a few good offers, and we ended up paying around £600 for a year's cover, which I was pretty happy with.
In comparison, if we were to insure the vehicle just as a van as opposed to a motorhome, we would have been looking at around twice that figure.
Here’s a few different motorhome brokers to get your search started …
The topic of insurance comes up a lot in the various groups we are in, and here are a few noteworthy points I’ve picked up on:

The biggest reason for converting our campervan was that it allowed us to create something entirely custom and based around our needs.
Here’s a few crucial things we wanted when building our van:
I recommend you make your own list as well, as this makes planning it so much easier.
The biggest issue for us, was finding a way to squeeze all of these things in; namely the shower and two double beds.
I searched hundreds of YouTube videos and didn’t find a single one that fitted the bill.
The only existing solution we could see was to include a winched double bunk bed which would mean we couldn’t see through the rooflight.
In the end, the design we came up with was entirely unique and, as far as I’m aware, no one has a van like ours.
And you what … our van’s layout is awesome!
It definitely wouldn't be to everyone’s taste, but it fits our needs absolutely perfect and we are chuffed to bits with it.
So before you actually start putting pen to paper, it’s important that you research other vans and list exactly which features you want to include.
If you’ve never really spent much time in a camper, it may be worth hiring one for a week or two to see what you pick up on.
I am so grateful that we spent 3 months travelling Scandinavia in the Tinggly blogger van in 2019, as well as a 2 week Ireland road trip with Spaceships Rentals.
Most of our design features are based around those experiences.
Namely, the fact that we wanted all the controls right next to the bed, so that we could switch the heater on without getting up into the cold!
Just remember: anything is possible, just be creative.
When creating mockups for the layout, I used good old-fashioned pen & paper and, equally old-fashioned, “Paint” on my laptop.
My drawings were just as rudimentary as those drawings I used to make back in year 3, but it did the job!
However, if you want to take things to the next level and make your life a bit easier in the long run, you should probably check out some space designer apps/tools such as VanSpace.
I only discovered these tools once our van build was underway, but they definitely would have helped in creating precise mock-ups of what our van would actually look and feel like.

If I was to do another camper conversion, then the first thing I would do is take 2 days to order absolutely everything I could possibly think of and then find somewhere to store it.
I’m talking everything right through from tools, to major appliances, to wood, to tiny details such as nails, screws and adhesives.
Having to wait for things to be delivered and making countless trips to Screwfix and Toolstation easily added an extra 2 weeks onto our build.
Of course, there will always be more things to buy, especially if you’ve never converted a van before; but having as much as possible to start with will make the whole build faster and less stressful.
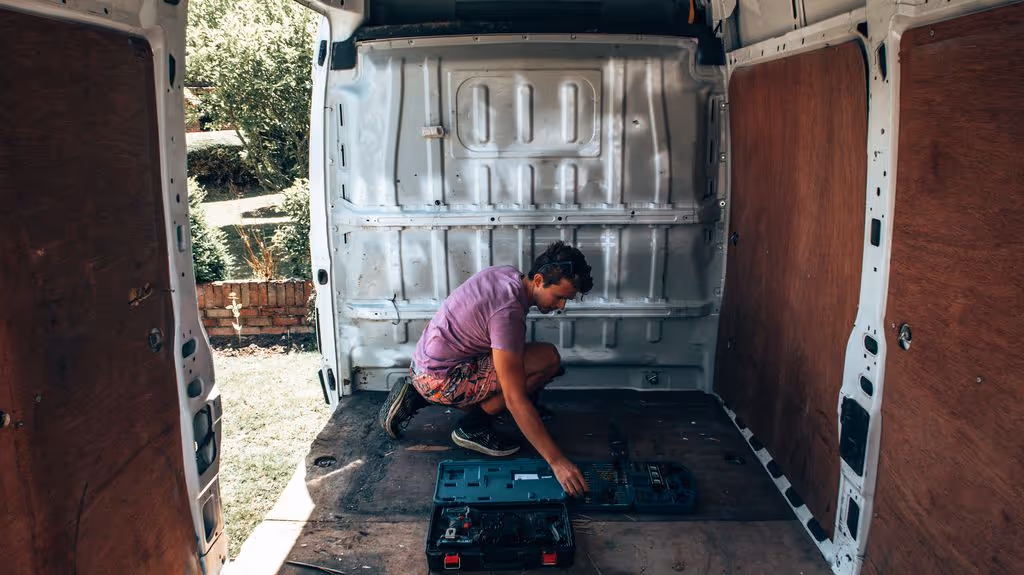
We did spend half a day ordering and collecting tools before we started and this was one of the best decisions we made.

The first stage of converting your van into a campervan is to cut some big old holes in it!
For our van, this meant installing:
It’s best to buy these items immediately as delivery times can be a few weeks, depending on stock.
But they do need to be in straight away as they affect the exact placement of everything else inside your van & would be a nightmare to install at a later stage.
The fact that your first main job includes cutting holes into your precious van can be daunting; I know it was for us!
My only advice would be to take it slow and easy.
Oh yeah, and maybe practice by cutting some wood first!
We used a jigsaw for all of the cuts in our van and they all went smoothly.
It definitely helped that we built a set of drawers for my room prior to beginning the van build, so I had a couple days worth of experience using the jigsaw.

Here’s some other tips when cutting into your van:

A key part of our design was having space for up to 4 people to travel in and sleep in the van.
The design we came up with included having an additional two seats in the back, which also doubled up as seats in the living area.
We got really lucky here as the garage that we bought the van from just happened to have a set of double seats leftover from a Ford Transit they had ripped out.
They were in great condition and cost us just £100.
We decided to pay the same garage to fit them for us as there are some requirements to bear in mind when installing seats in a van, namely that they have to be suitably installed.
Also, the exact positioning of the bolts through the chassis can be extremely awkward, and in our case required the van to be hoisted up.
We did search a local breakyard prior to buying the seats, but they didn’t have much there.
However, if you do need to buy some seats then I recommend checking locals yards or looking through listings on Facebook or sites like Gumtree.

The method we used to insulate and lay our floor is one that 99% of other van converters seem to do.
You basically want to lay Celotex (or Kingspan) insulation boards on the floor and then cover them in plywood.
There is some discussion as to whether or not to include wooden battens between the sheets in order to break them up and add some more support to the plywood above.
Many people don’t do this at all, and simply put down the Celotex and then ply straight on top.
For us, parts of the floor were very dinked up as the van had been used for hauling around heavy equipment.
So the approach we took allowed us to properly level it out; but ultimately it’s up to you.
If you buy a van that is new, then you can even save time and effort by laying the existing plywood flooring straight down back on top of the Celotex.
Our plywood floors and walls were very used and battered, so we had to carefully measure and cut out custom pieces for our floor; I did this using 9mm plywood.
Useful video: Insulating the floor in our campervan conversion
You don’t really want to be walking around on plywood all the time, so that’s why we went ahead and bought some vinyl flooring for our camper conversion.
We simply went to a local flooring supplier and looked through about a dozen catalogues until we found the design that we most liked.
It cost us just over £100 in the end; but you can definitely get it cheaper depending on which design you go for.
Surprisingly, laying this was one of the most stressful parts of the build.
We have about an hour's worth of footage of me losing my sh** when laying ours, as I messed up the cuts 3 or 4 times and it was only really by luck that we managed to get it to look as good as it does now.

There are 2 small parts of the floor that, if you look closely, you’ll notice they are patch up’s where I accidently cut away too much.
What annoyed me so much was that, as you cut it; if you mess up then there is nothing you can do to take that cut back.
You can pay someone to lay it for you if you like, and it may definitely save some stress.
However, if you have a basic square floor without added seats, then you should be fine.
What made it so tricky and complicated for us was that we already had to cut around the base for the extra seats and other boxed seating frame.
Be sure to lay your flooring as early as possible and then build everything else on top of this; this proved to be the best way to go.
Fitting the vinyl around the finished cabinets/bed/shower would have been a true nightmare and would have looked awful (+ wouldn’t have been as well waterproofed as it is).

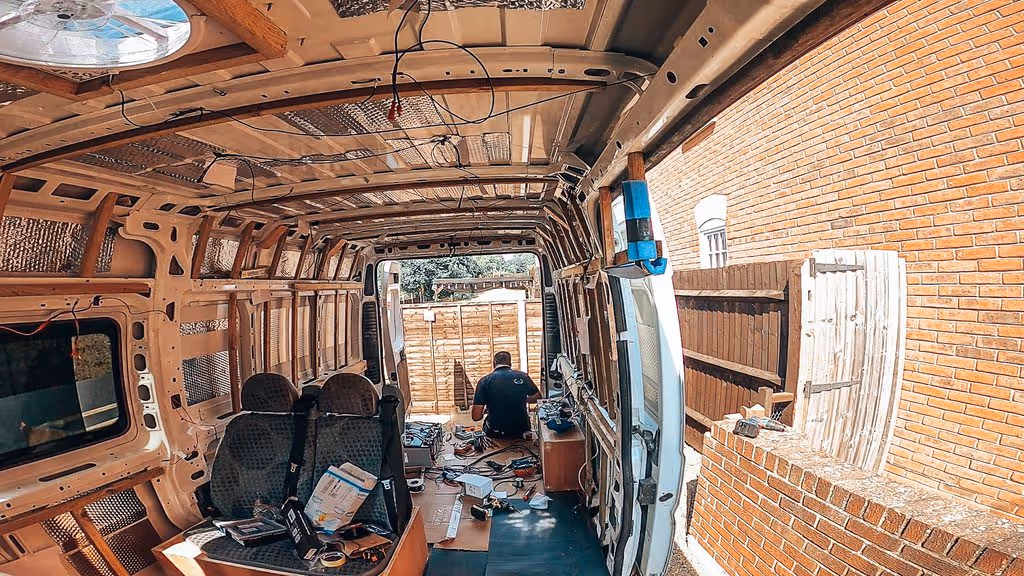
At this stage of turning a van into a camper, what you are doing is laying the structural foundation for everything else you build onto the walls.
It helps for you to have an exact idea of where everything in your van will be; namely:
This “stud work” will be behind the scenes but will be what all of these things are built onto.
If in doubt, the best thing to do is to add in as many support beams as possible, as when you clad onto them, they will be as solid as possible.
It’s hard to describe in too much detail, so instead I recommend watching this video below where I try to be as descriptive as possible with what we did.
Looking back, the 2 changes I would have made to how we did this studwork are:
Useful video: Framing the walls in our van conversion

Before you go any further, it’s now time to get your electrical setup installed. For this, you need 2 things:
Creating the electrical setup in our van caused me more stress and sleepless nights than any other part of the build.
Why?
Because I knew absolutely NOTHING about how electrics worked.
And no matter how much I read and watched I still just couldn’t get my head around it.
Unfortunately, if you want to convert your own van AND save money AND have an awesome setup, you do need to spend the time learning the ins and outs so as to know what’s going on and how to fix small issues as they crop up in the future.
Because there is so much to talk about, I recommend you check out this blog post I wrote on campervan electrics for beginners.
For now, here is an even more dumbed down and basic overview of our setup:
(*I’ve included links to the exact products we bought and from which companies*)
Read more: Best leisure batteries for campervans

For a few reasons, I highly recommend you find a qualified auto electrician to fit all of your electrics.
Why?
It took us some effort finding the right guy, but in the end he proved to be so helpful and friendly, and we had to take the van back a couple times to fit a couple extra things we realised we needed.
It cost us £60/hour and took 7 hours in total for everything.
This sounds expensive but is the going rate for someone who knows what they are doing.
Worth ... every ... penny.
Useful video: Installing electrics in our camper conversion
2022 Update: We recently reviewed the Jackery solar generator and were really impressed by how easy to use they are, and just how many outlets they have.

In short, these solar generators are a combination of a portable power station which you use to power your devices, combined with a portable solar panel.
The 500Wh unit we reviewed has 7 different charging ports, ranging from standard household AC units, through to USB ports.
And when it comes to charging them up, you can either to do so through standard shore power, via solar power (with the included panel) or via your cars outlet while driving.
What this means is you can have a straightforward power solution for your van, up and running in very little time at all.
Allowing you to power all the devices you need, without needing to spend thousands on all the components listed above and in our electric guide.
Don't get me wrong, I love our onboard system, and would highly recommend for anyone looking to live fulltime in a van. But if your budget is limited, and you want a quicker electric system, you could consider opting for a portable power station.


This is a crucial part of your van build; regardless of where you plan on travelling to in your van.
A well insulated van allows you to stay warm in cold climates, and also cooler in hot climates.
The insulation we went for was recycled plastic loft insulation from B&Q (we used about 7 rolls).
This is one of the few products I recommend you to buy from B&Q, as they are normally much more expensive than elsewhere.
However, in this case they work out much cheaper and it turns out that loads of people use the same stuff for their van.
In terms of holding it in place, this is where the stud work from two steps ago comes in really useful.
For most of the walls, you can simply tear to size and use the wooden battens to hold the insulation in place.
For parts where it falls or comes loose, use a spray-on contact adhesive to glue it down.
We did exactly this for the roof and it holds it well; especially once you add on the next part of the insulation … Thermo Van Liner (we used 20metres worth).
This stuff is really cool and acts, not only as additional insulation, but also as a vapour barrier; which allows everything to stay nice and dry despite condensation.
It also creates a nice flat finish across all parts of the van, and helps to hold in any wayward plastic insulation.
For any awkward to insulate parts of your van, you can use spray foam insulation; we used this for a few runners and had an absolute nightmare (Seriously, check out this part of our install video …); but it is good stuff once you get the hang of it.
Before we move on, it’s worth mentioning sound deadening, which is something we fitted below the insulation and against the panels of the van.
The idea behind this stuff is that it sticks straight onto larger pieces of sheet metal which would otherwise rattle and make noise when you drive along.
We ordered a pack of this stuff here from Dodo Matt (we used all 50 sheets) and stuck it against the panels and definitely made a difference when driving, before fitting all of the insulation.
It’s hard for us to now say how much of a difference it makes in the long run, once you’ve fitted cladding and whatnot; but it certainly doesn’t harm to have it there.
All I can say is that rattling panels when driving is not an issue we have, whether that’s because of the sound deadening or not I can’t guarantee.

By this stage of the build, we were really in full swing!
It feels like you’re finally getting somewhere as you finally have an insulated, wrapped shell that you can now build onto and start turning into a proper home.
We decided to clad the walls, which is a pretty popular choice. Some people choose to put plywood as walls instead, or even use reclaimed pallet wood.
The issue with pallet wood is that it can end up being quite a bit heavier, and does require a lot of work to treat and prepare.
In the end, we love our cladded walls and feel it creates a really homely feel.
We ended up using this cladding here from Wickes for the roof and this cladding here from B&Q for the walls.
Why use two different types?
Simply because Wickes ran out of stock!
There is very little difference in price or the finished product and they are almost identical, except the B&Q one is ever so slightly thinner.
If I had to recommend one to go for, I’d say go for Wickes, as the B&Q cladding tended to have more pieces in it that were unusable due to holes (an issue that many online reviews agree with).
Useful video: Cladding the walls in our campervan
You have two approaches here:
We took approach number 1 for the roof and approach number 2 for the walls.
If we ever did another van build, I would 100% take approach number 2!
Sliding together pieces of cladding that have already been varnished is an absolute nightmare! The tongues get thicker, the grooves get narrower and the wood bows slightly.
You can attach the cladding directly onto the wooden battens that you set up in step 9.
We put our Thermo Van Liner over the battens, and then when fitting the cladding, we nailed or screwed straight through and it worked perfectly!
When all connected together, cladding gets quite a bit stronger; all I will say is that make sure you have enough battens to attach to, with gaps between them ideally being no bigger than 30 or 40cm.

For the 3 doors on the van, we glued and nailed cladding onto 6mm plywood, then cut these big pieces to the exact shape and screwed them straight into the doors.
This means that if we need to get to the mechanics inside of the door in the future, then we can simply take the screws out and remove the necessary piece.
In fact, each door is made up of 3 individual pieces that slot together to create a seamless look, and we’re quite happy with it.
The only thing I will say, is that this adds a fair bit of weight to the doors, and you can definitely feel it on the sliding door.
In retrospect, I would have cladded 3mm ply instead as it would have reduced the weight slightly and still been as strong.
If you want to save even more weight, then there are other approaches you can take, I recommend searching on the Self Build Campervan group on Facebook to see what others have done; this was just the idea that I came up with at the time.

Here’s where the build gets exciting, because it’s time to start building the things you will actually use in your DIY campervan conversion!
For us, this meant building in:
I am by no means an experienced carpenter, but I am pretty darn happy with how everything turned out.
Everything is strong and solid and serves its purpose.
I will just go ahead and list some of the main tools and components we used to build each part.
Useful video: Building the shower in our camper
Useful video: Building cupboards in our van conversion

I literally had no idea how this was supposed to work until a few days before it became essential that we needed one!
It definitely would have helped to have a firm understanding before, as I could have properly planned out how and where water would run, and how this affects the placement of different elements.
But in the end, our setup of appliances changed quite significantly based on regulations as to where our water heater had to be placed; but we ended up with a pretty efficient setup, space-wise.
Here’s the basic gist of how our campervan water system works:

In the end, installing the gas system was the biggest headache of the entire campervan conversion for us.
Finding a reliable gas engineer to talk us through our system and to check it was all properly installed was a nightmare, and we were let down by 4 different people.
My approach was to go through the Gas Safe Register and find engineers that have the “caravan” & “LPG” qualification.
The problem is that not a single person I spoke to had ever actually used any of these qualifications.
In the end, we managed to get ahold of someone from the MCEA (Mobile Caravan Engineer Association).
Finally, we were able to find someone who actually had experience with campervans and had previously installed the various appliances we had purchased.
So, if you need to find an engineer, which you should as it’s likely your van insurance will be invalid without a certificate from one, then I suggest you take this same route and avoid anyone who hasn’t actually used their caravan or LPG tickets before.
Our current gas setup is more advanced than what we had originally:
For the first few months, our setup included an onboard 15kg tank and all of the appliances on one gas line. The issue was that our heater had a fault so we had to remove it. In doing so it messed up our entire system! Under the new setup (with the manifold) we are able to isolate each appliance individually if there are any problems.
Better yet, it free up a whole cupboard worth of space!
(P.s. The best way to get your 8mm pipe and compression fittings is through BES. They sell proper Wade fittings which are gas suitable. Our original setup had fittings from Screwfix and these only caused us problems as they are not meant for gas.)
The reason that we currently have a Homebase LPG canister in the van is that it’s the only bottle we could get ahold of during the whole covid situation (Calor had stopped issuing new contracts).
The problem with our current setup is that it does take up quite a bit of space in the living area.
So the plan in the very near future is to install an underslung LPG canister (like this) under the van.
These can then be refilled all across Europe (and the rest of the world) as long as you have the correct local adaptor.
You cannot do this with Calor or Homebase/Flogas canisters, so if you plan to head abroad then it’s best to get a refillable canister.
They are very expensive to buy, but then a fraction of the price to refill.
Here’s a few rules that we learned and that need to be followed when fitting gas in a campervan
Based on what we’ve read, it is definitely best to bring in a trained engineer to advise you when fitting these appliances and then to check your system afterwards.
Not only will it possibly save your life, but it will also mean you don’t run into any insurance issues if a few months down the line your van burns down because you installed something incorrectly.
Oh yeah, and remember to buy a carbon monoxide alarm!

Once you get this far it should just be a case of putting in some finishing touches to make your van more homely.
This is entirely personal and up to the finished look you want to achieve; but here’s some links to a few things we decided to add to our van:
Useful video: Decorating our campervan <-- Final video in the van build series!

Once your conversion is finished it’s time to submit it to the DVLA and reclassify the vehicle from being a van to a motorhome.
You’ll probably need to do this in order to meet the requirements of your chosen insurer.
Our insurer gave us a 3 month conversion period in order to get the van finished, submitted to the DVLA and to get a response.
As long as we met the required guidelines for converting to a campervan, our insurer didn’t mind if our application to have the van reclassified as a campervan was denied.
If you're converting a van into a campervan, it’s important that you check the DVLAs official guidelines as these do change over time.
At the time of our submission (October 2020), the DVLA required us to meet a number of different criteria both inside and outside of the van.
Such as ...
It’s worth pointing out here that the vast majority of requests for reclassification were being denied by the time we submitted our request.
This started sometime in late 2019/early 2020 when the government changed it’s guidelines and became a lot stricter.
We learned this from various Facebook groups where the discussions on this topic happened on a near daily basis with everyone complaining that they had been failed despite ticking all of the boxes.
It all comes down to one simple fact … your van must look like a campervan in traffic in order to be properly reclassified.
Most conversions, particularly ours, fail to really look like a campervan, but instead look like a “van with windows”, which is what our classification came back with.
In the official letter we received, they said that inside we had met all the requirements and the DVLA were happy for us to use the van for motorhome purposes, however from the outside it didn’t look enough like a motorhome in order to pass.
We have seen a number of vans, with big graphics and 3 or 4 large windows be failed and still only reclassified as a “van with windows”.
It comes down to things like using “motorhome windows” which are different to the bonded window that you see on our van.
Basically, it shouldn’t be an issue as long as you are clear and upfront with your insurers.

Well, that’s about it!
If you read that whole thing, then congrats; it ended up being pretty epic.
Turns out I had a lot to get off my chest, I definitely feel better now … and breathe …
Remember, you can find the full 13 week build series on our YouTube channel.
Now over to you ...
Do you have any questions that you couldn't find answers to above?
Or do you have any tips you think we missed out on?
Drop me a comment below, I'd love to hear from you!
Our other campervan guides:


Leave a comment
Let us know what you think!